 |
| #3 Girl - Doctor. #4 Boy - Robber. #2 Boy - Skeleton Man. #7 Boy - Original Lego. #5 Boy - Police Man. #1 Girl - Princess Leia. #4 Boy - Chef. |
This year our costumes ended
up above and beyond our usual themed costumes...so after awesome reviews
we submitted our costumes to an online costume contest. We submitted in the "group" category and will
find out Nov. 15 who the winner will be. Since we submitted it to the
contest we wrote up a lot about our costumes and the detailed work we
put into making them along with some of the great comments that we
received. Those questions are answered below (we could only submit 3
photos but included LOTS more for your pleasure!).
 |
| Lego Minifigures |
- How did you come up with the idea for this costume?
Every year we decide on a theme for our family costumes. This year we discussed some possible ideas
with our children. Our son has had an
obsession with Legos recently and so it wasn’t a surprise when he was excited
about our suggestion to be Lego minifigures.
He put together a selection of Lego minifigure body parts and told us “I
want to be this guy!” The Lego
minifigure idea was a good fit because we have seven children and each could
pick his or her own favorite Lego character or combination of characters. We were a bit hesitant because we knew it
would be a large undertaking but after repeated pleas from our children, we
couldn’t say “no.”


- What items did you use to make this costume including
accessories used? How did you make it? Step by step details are encouraged.
Step 1: We took
measurements from a Lego minifigure and based on the height of each child we determined
the size needed to build bodies for each child proportionate to a Lego
minifigure.
Step 2: We
measured and cut the ¼ inch foam board with an Exacto knife based on the sizes
determined in Step 1. Pieces included, the front and back of the body, the
sides (leaving room at the top for arms), and shoulder supports. We made sure to keep each set of parts in
their own piles so that they wouldn’t get mixed up.
Step 3: We used white
duct tape to attach the upper bodies together, taping only on the inside of the
body to maintain the quality of the costume’s exterior.

Step 4: Sizing
and cutting the legs was its own challenge.
The legs were also made of mostly the ¼ inch foam board. Again we used measurements from a Lego
minifigure but also took into account each child’s inseam and shoe size. We traced various rounded objects to include
a curved section at the top of each leg to simulate the hinge on an actual Lego
minifigure’s leg. The front of this
rounded section was made from white cardstock.
The bottom of the foot was left open for the sole of the shoe.

Step 5: We taped
the legs together using clear packing tape on the outside to provide better
support as we anticipated the legs would take a severe beating on Halloween
night. We also taped an additional foam
partition inside the foot as the Lego legs were much wider than our children’s
actual legs and feet. This allowed the
children to have better control of the legs and prevented the legs from
spinning.
Step 6: We cut concrete
cylinder molds (10” and 12”) with an Exacto knife to a size that was
proportionate to the body of each costume.
Then we cut generously sized eye holes in each head and taped cardboard
to the top of each head to act as a base for the hair or hats.


Step 7 : We then wrapped each head with white or
yellow posterboard. The posterboard was attached with clear packing
tape on the back of the head.
Step 8: We spray
painted the bodies and legs that were not white with their respective colors.
Step 9: We added
the headpieces to each Lego head using spray paint, Great Stuff foam (dried and
carved with a serrated knife), foam board, or a pillowcase.


Step 10: Each Lego minifigure had a unique face but we
used a generally similar approach for all of them. Each child had their head measured and a
cardboard box built snuggly around it, leaving the face open. We marked where their eyes were on the box. We aligned the eye-mark on the box with where
we wanted the mouth (or mustache) of the Lego minifigure. We then cut drew and cut each mouth (or
mustache) and secured the box inside the head with packing tape. The box provided additional stability and
mobility to the head. The mouth holes
were covered from the inside with the self-adhesive sheet rock seam mesh. We left the mesh white for those that had
team and colored it black for the mustache and skeleton mouth.


Step 11: We
penciled on faces and body designs then colored over the pencil with
Sharpies. Designs mostly mimicked actual
Lego minifigures.


Step 12: For the
hands, we purchased black gloves from the dollar store and six cans of corn
meal from the grocery store. We dumped
the corn meal into zip lock bags, removed the tops and bottoms of the corn meal
cans and cut them in horizontally. We
then cut a vertical section out of each half.
We spray painted the halves yellow with the exception of one set which
we spray painted white for the skeleton.
Once dry, we sewed the hands to the first knuckle of the gloves.
Lucky Step 13: It
wasn’t practical to put our 4 month old into a bulky costume but we wanted to
include him in the Lego minifigure theme so we bought a yellow beanie and drew
a smiley face on it. We bought a red onesie
and ironed on a Lego logo that was printed onto iron-on printer fabric. To complete the costume, we added blue pants
and red socks.


- What reactions did you get when wearing this costume?
People were in awe!
Everyone who saw the costumes commented on how amazing they were. Comments
seemed to be solely on our costumes even though we trick-or-treated with others
who had their own homemade costumes. Those that saw us trick-or-treating made
comments such as:
- AMAZING!
- These are the BEST costumes we have seen tonight
- SO creative
- That must have been a TON of work
- Best dressed kids in the neighborhood!
- STOP! I HAVE to get your picture!
We also were inundated with comments from coworkers, family and
friends who saw photos of our costumes.
These comments included:
- Boy (4 years old) just saw this picture and yelled, "Mom, look legos! I want to get those legos for my birthday!" Very realistic
- That's some talent you got there, so creative and cute.
- You. Are. Awesome.
- These are amazing!!! Please tell me you are in some kind of best costume competition, you'd totally win!
- Love love love it! You went above and beyond this year!
- Moms like you make me look really bad! LOL! This is fabulous! I had better not show my kids!
- Noooo way! I love it
- Are these really your kids!?!?
- Wow- You took the Lego theme to a whole new level (a fellow Lego costume designer)
- I want to know where or how you got the costumes. They look awesome.
- Un.be.lievable!
- Is there anything else you'd like to share with us about this costume? This question is optional
Princess Leia: We
sprayed rows of Great Stuff over the egg carton and head to form a part down
the middle of the head. We also laid out
cling wrap on the ground and sprayed Great Stuff in a spiral pattern to form
Leia’s signature buns. We attached the
buns to the sides of the head using a hot glue gun.


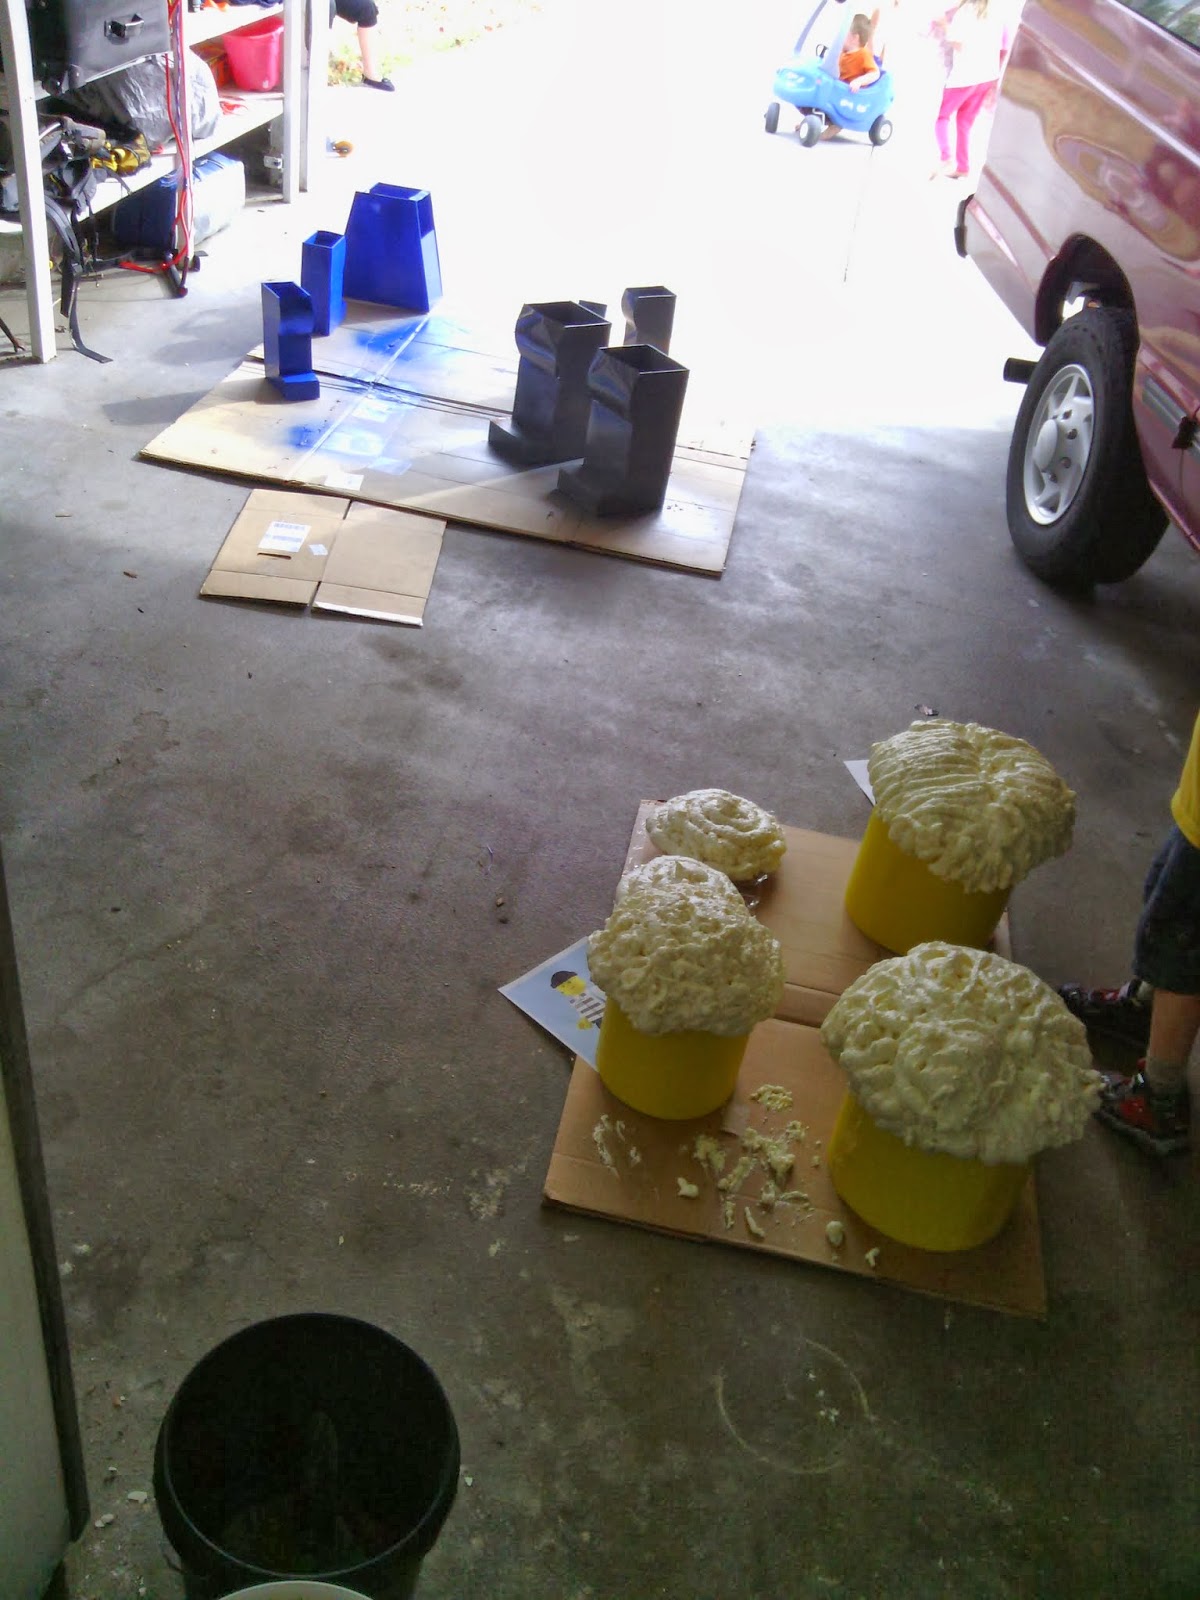
Skeleton Man: This
one had a very simple body and legs but complex-to-create hat. We sprayed as much Great Stuff on top as we
could. Our first attempt resulted in
Great Stuff falling off the head onto our garage floor, resulting in a
significant mess. Note to self, “spray
Great Stuff over cardboard or newspaper.”
We let the mess dry and then tried again the next day. This time we put Great Stuff on in smaller
amounts and allowed it to dry some before applying more. Eventually we had enough that we could carve
the foam into the general shape of the hat we wanted using a serrated knife. We then applied more Great Stuff foam to the
holes and gaps, let dry, and carved again.


Lady Doctor: Similar
to the first two heads, we sprayed on Great Stuff foam in lines similar to the
actual Lady Doctor Lego minifigure’s hair, adding a spiral bun directly onto
the top of her hair.


Chef: We cut and
added an additional section of concrete cylinder mold to the top of the head to
form the base of the chef’s hat. We then
pulled a white pillowcase down over the head, unstitched the closed end of the
pillowcase, and taped the inside of the pillowcase to the extra mold to keep it
in place. We gathered an armful of 1
inch square foam pieces (cut up couch cushions) from our basement foam pit (don’t
ask-a story for another day) and stuffed them in the unstitched end of the
pillowcase to give the hat volume. We then
tied the top closed and tucked it in.


Policeman: Using
leftover ¼ inch foam board, we cut the rim of the police hat and cut a hole in
the rim so it cut fit snugly over the head.
Eight sides were cut from the ¼ inch foam board and fastened together with
tape. The top of hat was traced from the
existing sides, cut and taped to the rest of the hat. We spray painted the hat blue, cut a badge
from the leftover yellow posterboard and attached with tape and foam board
supports.


Robber: We sprayed the head with Great Stuff foam
in a circular pattern. The Great Stuff
foam dried overnight and then we carved it into the shape of a dome using a
serrated knife. We added some additional
foam for the rim of the hat, let it dry overnight, then carved it to the desire
shape.


For each of the heads that used Great Stuff foam, we started
by taping some object to the top of the head to give it some body (i.e. egg
carton, Pop Tart box, partial milk jug) before spraying on the foam. Each time we used the Great Stuff foam it had
to dry overnight before carving or painting.
Before painting, we wrapped the posterboard part of the head in cling
wrap and then spray painted the hat or hair.
*Side
Note (not included in the contest): Getting everyone ready and into
costumes for photos was it's own challenge. But we made it! All
costumes were brought down stairs and lined up according to child.


Then
I had each child dress in order: legs, shoes, body, gloves then heads.
As we headed out for photos #6 Boy tripped two different times landing
flat on his face. We did a few group photos. I asked the children to
smile but #6 Boy just won't! ;) Then I started youngest to oldest
doing individual shots and dissembling costumes after. Dad and I but
headed out Trick-or-Treating this year, and it was a good thing. They
needed all the extra help they could get. We made it across the street
with their legs and after that we called declared that all legs would be
left at home!
 |
| Lego Minifigures |
No comments :
Post a Comment